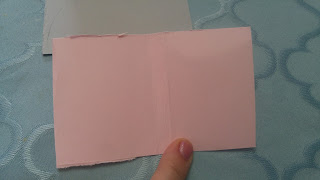
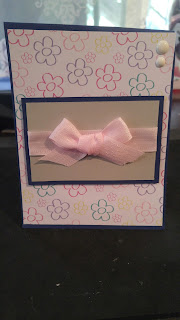
Today is going to be a tutorial...or at least I'm going to try. We are going to make a twisted pop up card. What is this you ask? It's when you open the card and the inside twists open into a pop out. It is so much fun for displaying a scene or a fun message. I hope it comes out clear but if you have any questions please don't hesitate to hit me up in the comment section and I'll try my best to clear anything up.
Remember to read the whole step before beginning...steps like step 11 have some important points in them to make your life easier
Ok let's not waste any time and just jump right in.
Step 1: Cut 1/2 inch off an 8 x 11.5 paper making it 8 x 11 (On the paper I accidentally wrote 1/4 of an inch...but it's really 1/2 inch off.)
Step 2: On short side (so the long ways pointing down - vertical) score at 2 1/4; 4 1/4; 6 1/4
Step 3: On the long side (so paper is horizontal) Score at 3 7/8; 5 3/8; 6 7/8
Breath...you're doing great!
Step 4: Cut off all the 4 corner rectangles
Step 5: Face the t towards you with the short sticks horizontal. Fold the short hand down so the middle score lines match up, bone fold down to make a new score line. Do the same for the other side. This should make an X over the center score line that was already there previously.
Step 6: Pinch small t arms in towards themselves(towards you) folding it into itself. Push down and bone fold the creases to make them very crisp (this will help it fold and open with ease)
Step 7: Now to make the panel that goes across
3 x 10 inch paper
Fold it in half, ope up and fold one end to the middle, do the same on the other side. Now you should have a panel with 4 squares


Step 8: Decorate your squares to your liking
Step 9: Make a card base 4 1/4 x 11 1/2 (It needs to be a vertical card)
Step 10: Make inside panels to cover the back of the folding mechanism. I trace the outside to get the correct shape and then I trim off about 1/8 of an inch off the sides and bottom so that there will be a nice border around the edges. This will then fit perfectly on the background of the folding paper and give it a nice back drop
Step 11: Attach your middle panel onto the folding mechanism. This is Important: Add adhesive to opposite corners. This is important because if you add it to the top on both sides it won't fold. Also make sure you stay above or below the score line to avoid stunting your card from folding. If you add adhesive to the top on one side then add adhesive to the bottom on the opposite side. You're only adding adhesive to two spots. And add the adhesive to the folding mechanism not to the panel as part of your panel will be sticking past your folding mechanism paper.
Step 12: Attach the folding mechanism to the card base. Glue down the back first. Make sure the point of the fold doesn't go over the bases score line. It should go right to the fold but not over. Then glue down the front Walla you are done the majority of the work
Step 13: Decorate the front of your card to your liking
Step 14: Have a glass of wine, you deserve it.
I love opening and closing these cards they just make me so happy!

Thank you for joining in this first ever written tutorial. If I have missed something or not clear in a step please let me know and I will do my best to clear anything up. I appreciate you stopping by today.
Happy Crafting
Chelle


